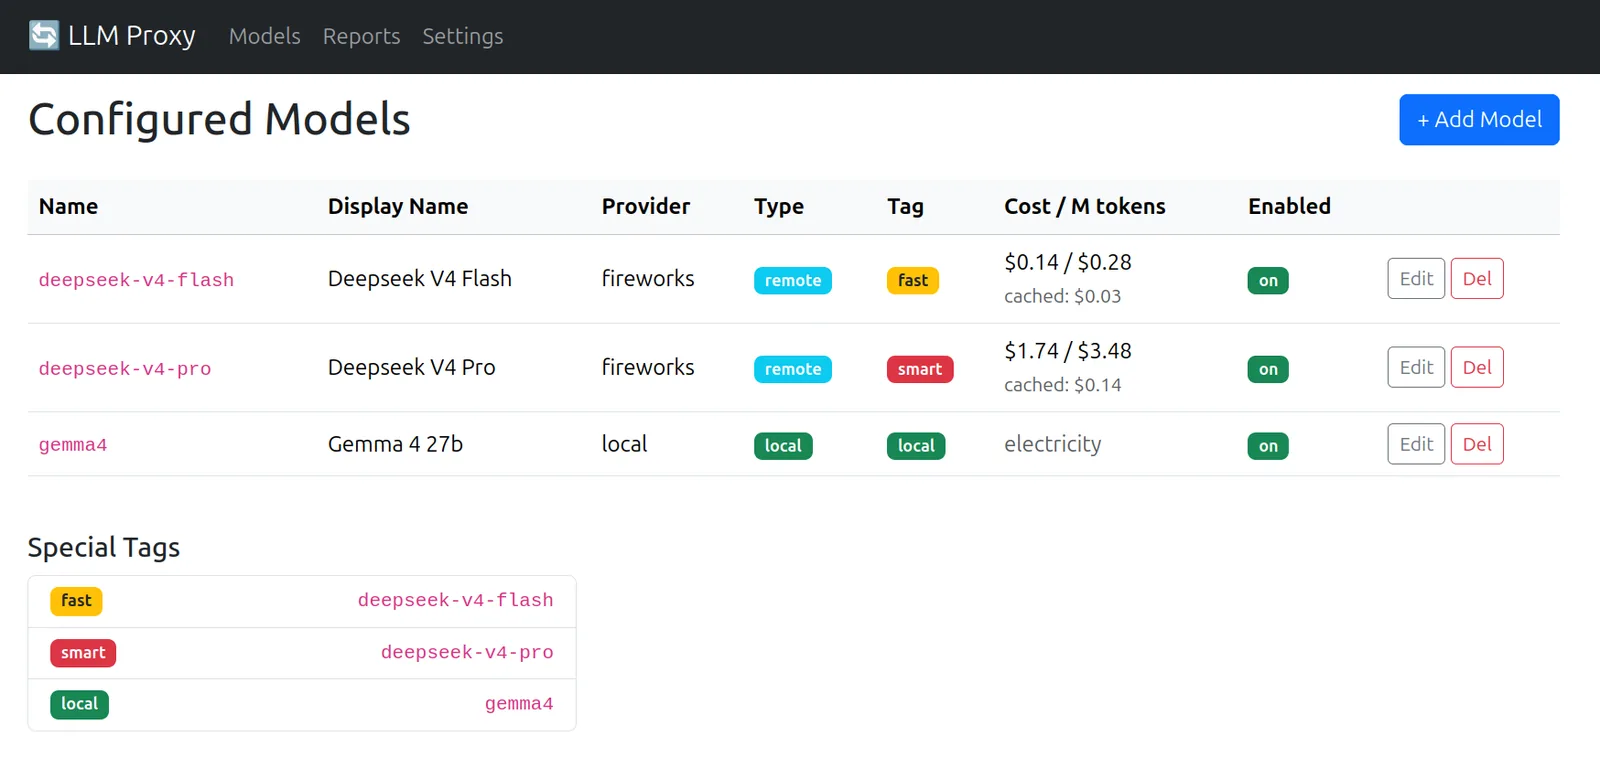
LLM Proxy web dashboard — model management and usage overview
A lightweight OpenAI-compatible API proxy that sits between your AI clients and any number of LLM backends — rewriting model names, tracking token usage and cost, and providing automatic fallback between fast ↔ smart models.
A Flask-based proxy that presents an OpenAI-compatible API endpoint while managing multiple LLM backends behind the scenes. Add models through the web UI, tag them as fast or smart, and the proxy handles auto-fallback, usage tracking, and cost calculation — no config files to hand-edit after initial setup.
Your AI client sends requests to the proxy's /v1/chat/completions endpoint. The proxy rewrites the model name, forwards to the right backend, tracks token usage, and returns the response — all transparently.
Tag one model as fast, one as smart. Request "model": "fast" to hit your cheap model automatically. If it fails, the proxy falls back to smart — and vice versa.
Everything you need to manage LLM backends from a single endpoint.
Add, edit, and delete model backends through your browser. Manage fast/smart/local tags, view the dashboard at a glance. No config file wrangling.
FlaskDrop-in replacement at /v1/chat/completions and /v1/models. Works with any OpenAI-compatible client — just point it at the proxy URL.
If a fast-tagged model fails (server error / timeout / rate limit), the proxy automatically retries on the smart model, and vice versa.
Per-model, per-day token counts and dollar costs. Remote models use per-million-token pricing. Local models use wattage × electricity price.
ChartsSSE streaming works out of the box. Streamed responses are cost-tracked too — the proxy adds stream_options: {"include_usage": true} for token reporting.
All config and usage data lives in data/*.bson via MooFile. Persistent, portable, and easy to back up.
Once running, point any OpenAI-compatible client at the proxy.
"model": "fast", "smart", or any specific model name.# Use the fast model (auto-fallback to smart on error) curl http://localhost:8086/v1/chat/completions \ -H "Content-Type: application/json" \ -d '{ "model": "fast", "messages": [{"role": "user", "content": "Tell me a joke!"}] }' # Use the smart model for heavier tasks curl http://localhost:8086/v1/chat/completions \ -H "Content-Type: application/json" \ -d '{ "model": "smart", "messages": [{"role": "user", "content": "Write a detailed analysis..."}] }' # Use a specific model by its configured name curl http://localhost:8086/v1/chat/completions \ -H "Content-Type: application/json" \ -d '{ "model": "deepseek-v4-flash", "messages": [{"role": "user", "content": "Hello!"}] }' # List available models curl http://localhost:8086/v1/models
Get the proxy running in under a minute.
# 1. Install dependencies
./ubuntu-install.sh
# or manually: pip install -r requirements.txt

# 2. Configure
cp .env.example .env
# Edit .env — set PROXY_PORT, BIND_HOST, and FLASK_SECRET_KEY

# 3. Run
./start.sh

# 4. Open the web UI
open http://localhost:8086/

# 5. Add your first model through the browser
# No manual config file editing — just fill in the form!
| Variable | Default | Description |
|---|---|---|
PROXY_PORT | 8086 | Port for proxy + web UI |
BIND_HOST | 0.0.0.0 | IP to bind to |
PROXY_THREADS | 32 | Max concurrent requests |
FLASK_SECRET_KEY | — | Flask session cookie secret |
All model management is done through the web UI — no config files to hand-edit.
| Field | Description |
|---|---|
| Name | Unique identifier (used as "model" in API) |
| Display Name | Human-readable label |
| Provider | e.g. fireworks, openai, local |
| Type | remote (token pricing) or local (electricity pricing) |
| Tag | fast, smart, or local |
| Base URL | Backend base URL |
| API Key | Auth key for the backend |
| API Model Name | Model name sent to backend |
| Pricing | Per-million-token prices |
| Enabled | Toggle on/off without deleting |
fast — your cheap/quick model. Falls back to smart on error.
smart — your capable/slow model. Falls back to fast on error.
local — a model on your own hardware. No fallback.
At most one model per tag. If you only have one model, tag it fast — fallback is automatically disabled.
Visit /reports for matplotlib-powered cost and usage charts.
Bar chart of cost per day for the last 30 days — see where your budget is going at a glance.
Monthly cost bar chart for longer-term trend analysis.
Horizontal bar chart breaking down costs by individual model.
Stacked bar chart of input vs output tokens per day.
Today / this week / this month totals with per-model breakdown.
Configure electricity cost ($/kWh) and max wattage for local model cost calculations.